Blog

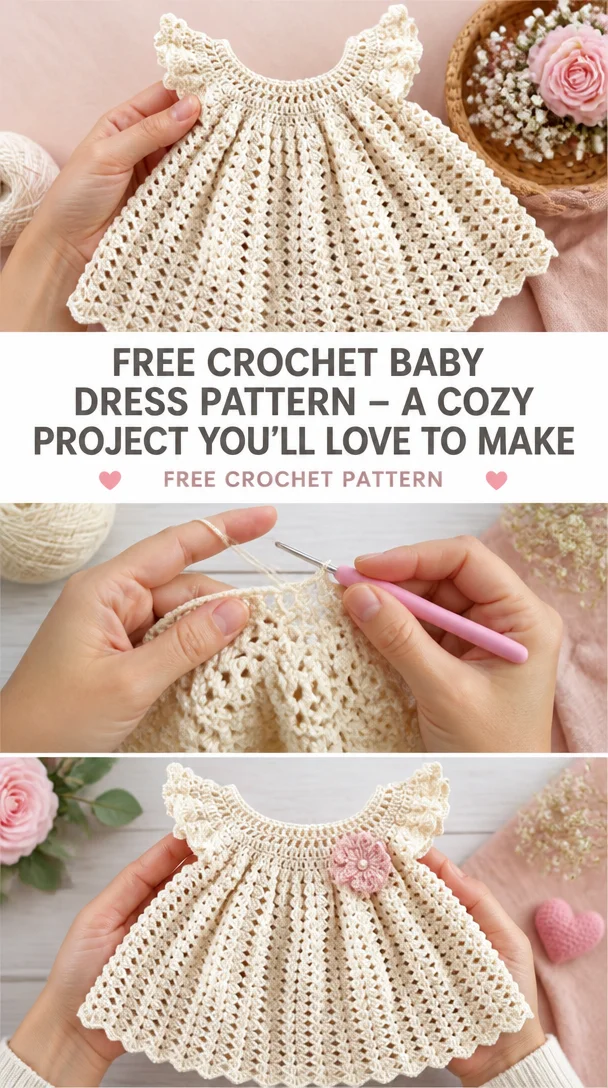
  • Free Crochet Baby Dress Pattern – A Cozy Project You’ll Love to Make

    Free Crochet Baby Dress Pattern – A Cozy Project You’ll Love to Make

    Article

    Free Crochet Baby Dress Pattern – A Cozy Project You’ll Love to Make

    22 Sweet And Easy Crochet Baby Dresses for Little Fashionistas

    Crocheting little clothes for your kids is one of the best experiences that come with being a parent. Crafting sweet and charming crochet baby dresses not only allows you to express creativity but also results in practical, adorable outfits for your little ones. These dresses are perfect for playdates, family gatherings, or simply dressing up your baby for a charming photo session. Whether you’re an experienced crocheter or just starting, this collection of 22 sweet and easy crochet baby dresses will delight those looking to create handmade gifts for baby showers, newborn arrivals, or everyday use. Enjoy making something special that can become a treasured keepsake!

    Crochet Baby Project Overview

    • Skill Level: Beginner to Intermediate
    • Finished Size: Varies by pattern
    • Yarn: 100% cotton or baby-safe acrylics recommended
    • Crochet Hook: Size H (5.0 mm) or as specified
    • Colors: Your choice of colors based on personal preference
    • Estimated Time: 3–6 hours depending on the pattern
    • Project Type: Dress
    • Best Use: Everyday wear, special occasions, photo ops
    • Gift Suitability: Ideal for baby showers, first birthdays, or just because!

    Materials You’ll Need

    • Worsted weight yarn (or appropriate weight as per each pattern)
    • Crochet hook (size as specified)
    • Stitch markers
    • Yarn needle
    • Scissors
    • Buttons or decorative elements (as needed)
    • Embroidery thread for embellishments
    • Ribbon (optional for tie details)

    Crochet Abbreviations

    Here are some common crochet abbreviations you may encounter in the patterns:

    • ch: chain
    • sc: single crochet
    • dc: double crochet
    • st: stitch
    • sl st: slip stitch
    • inc: increase
    • dec: decrease
    • sp: space

    Before You Start

    Before you dive into your crochet project, consider the following tips:

    • Choose Baby-Safe Yarn: Select soft and hypoallergenic yarn to ensure your baby’s comfort.
    • Check Your Gauge: Make a swatch to ensure your stitches match the specified gauge.
    • Keep Tension Consistent: Aim for even tension to avoid uneven sizing.
    • Plan for Assembly: If the dress consists of multiple pieces, organize your workload to ease the assembly process.

    Free Crochet Baby Pattern

    For each of the 22 dresses, the patterns will generally follow these sections. Here’s an example structure for a standard dress:

    Main Piece

    • Begin with a chain of the required length.
    • Row 1: sc into each chain, turn.
    • Row 2: dc in each st across, turn.
    • Continue in pattern until the piece measures desired length.

    Body

    • Work in rounds or rows as specified, ensuring to create openings for armholes if applicable.

    Sleeves

    • Make two separate pieces or work directly onto the body for a seamless design.
    • Work in rounds or flat, as indicated.

    Finishing

    • Weave in all ends, sew on buttons, and attach any decorative elements.

    Assembly and Finishing

    • Join Pieces: If your dress consists of separate pieces, align them carefully and sew using slip stitches or your preferred method.
    • Add Decorations: Attach buttons, ribbons, or any other decorative bits to enhance the look.
    • Weave in Ends: Use a yarn needle to tuck in all loose ends for a neat finish.

    Baby-Specific Tips

    When creating crochet items for babies, consider these practical tips:

    • Opt for Soft Yarns: Avoid rough or irritating materials on your baby’s sensitive skin.
    • Check Seams and Attachments: Ensure that all seams are strong and that all decorative elements are securely attached.
    • Select Appropriate Sizes: Follow pattern instructions closely for sizing references, remembering that babies often grow quickly.
    • Washing Considerations: Choose yarns that withstand gentle washing and drying to maintain your handmade creation.

    Customization Ideas

    Feel free to get creative! Here are some customization ideas:

    • Color Variations: Change the dress colors according to themes or seasons.
    • Yarn Choices: Experiment with different yarn textures for various effects.
    • Sizes: Adjust the pattern for different age ranges.
    • Decorative Details: Add crocheted flowers, initials, or even appliqués of favorite animals.

    Common Problems & Troubleshooting

    • Uneven Tension: Work in front of a well-lit area and focus on your stitch consistency.
    • Incorrect Stitch Counts: Count stitches frequently—this helps avoid major corrections later.
    • Sizing Issues: Adjust your hook size or refer to the gauge as needed.
    • Assembly Problems: Take your time with assembly; don’t rush the finishing touches.

    Care Instructions

    To care for your finished crochet baby dress:

    • Washing: Hand wash in cold water to keep colors vibrant.
    • Drying: Lay flat to dry, avoiding direct sunlight to prevent fading.
    • Storage: Store in a cool, dry place when not in use to maintain its shape and appearance.

    Baby Safety Notes

    When making or selecting crochet items for babies, always keep safety in mind:

    • Small Detachable Parts: Avoid using small buttons or ornaments that could be a choking hazard.
    • Secure Stitching: Regularly check for any loose stitching and make sure decorations are tightly secured.
    • Functionality: Ensure that any drawstrings or ties are not long enough to pose a choking risk.

    Frequently Asked Questions

    • Is this crochet baby project beginner-friendly?
      Yes, many patterns are suitable for beginners with simple stitches and techniques.

    • What yarn is best for this baby crochet project?
      Use soft, hypoallergenic, and lightweight yarns that are gentle on a baby’s skin.

    • What size will the finished project be?
      Sizes may vary; refer to individual patterns for specific measurements.

    • Can I make it in different colors?
      Absolutely! Feel free to use any color palette that fits your style.

    • How should I wash the finished crochet item?
      Hand wash in cold water and lay flat to dry for best results.

    Conclusion

    Crocheting baby dresses is a delightful way to create something special for your little fashionista. With each stitch, you’re crafting a piece that can be cherished for years. Get started on your crochet journey today, and enjoy creating beautiful garments that will make your baby shine!
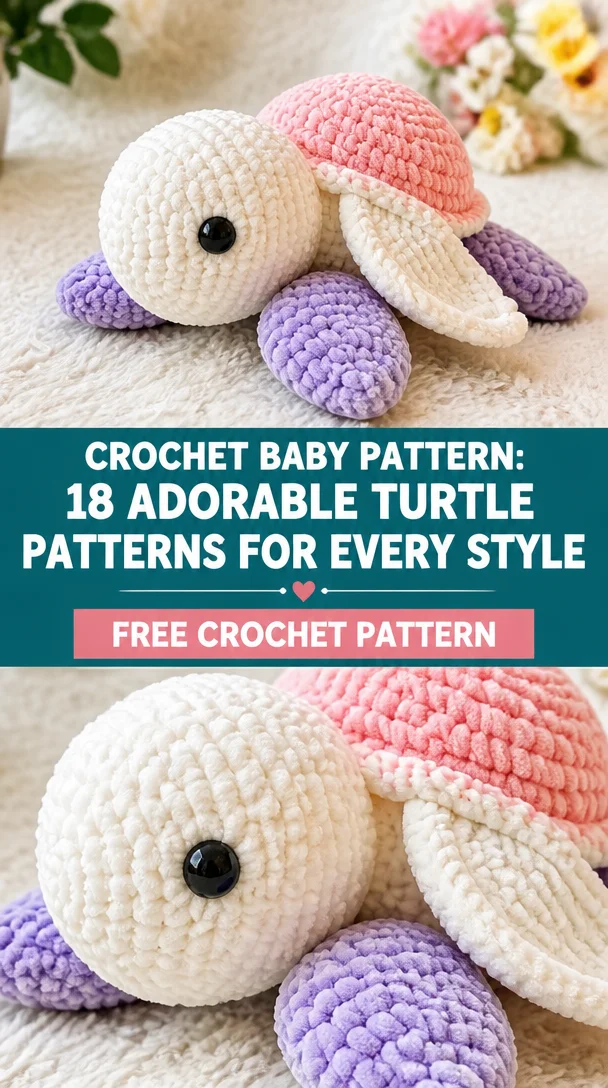
  • Crochet Baby Pattern: 18 Adorable Turtle Patterns for Every Style

    Crochet Baby Pattern: 18 Adorable Turtle Patterns for Every Style

    Article

    Crochet Baby Pattern: 18 Adorable Turtle Patterns for Every Style

    18 Adorable Crochet Turtle Patterns for Every Style

    Crocheting lovely turtle patterns can be a delightful way to create sweet baby items that are both charming and functional. Whether you are an experienced crocheter or a beginner looking for your next project, these 18 adorable crochet turtle patterns are sure to captivate you. From charming strawberry turtles to cozy plushie turtles, vibrant sunflower turtles, and whimsical crochet ice cream turtles, there’s a style for everyone! These delightful creations make wonderful gifts for baby showers, cherished keepsakes for newborns, or whimsical nursery items that can brighten up any room. Join the joy of crafting these cute critters and give a heartfelt handmade gift that will be treasured.

    Crochet Baby Project Overview

    • Skill Level: Beginner to Intermediate
    • Finished Size: Varies by pattern (usually around 6-12 inches)
    • Yarn: Medium-weight yarn (worsted)
    • Crochet Hook: Size H/8 (5 mm) recommended
    • Colors: Various, according to design
    • Estimated Time: 3-6 hours depending on experience
    • Project Type: Amigurumi
    • Best Use: Nursery décor, toys, or cozy companions
    • Gift Suitability: Perfect for baby showers, new parents, and as nursery items

    Materials You’ll Need

    • Medium-weight yarn in assorted colors
    • Size H/8 (5 mm) crochet hook
    • Stuffing (polyester fiberfill)
    • Safety eyes (if applicable)
    • Yarn needle
    • Embroidery thread (for embellishments)
    • Scissors
    • Stitch markers (optional)

    Crochet Abbreviations

    • Ch: Chain
    • Sc: Single crochet
    • Dc: Double crochet
    • Sl st: Slip stitch
    • Inc: Increase
    • Dec: Decrease
    • Rnd: Round

    Before You Start

    Before diving into your crochet turtle project, consider a few important preparations:

    • Check Gauge: To ensure your turtle turns out the right size, it’s a good idea to check your gauge.
    • Choose Soft Yarn: Always opt for baby-friendly, soft yarn to ensure comfort for little ones.
    • Work in Continuous Rounds: When working in the round, avoid joining unless specified for a seamless look.
    • Consistency is Key: Maintain even tension throughout your project for a polished finish.

    Free Crochet Baby Pattern

    Although we cannot provide a complete pattern in this section, we can guide you on how to structure your piece:

    Main Piece for Turtle

    1. Start with the Shell:

      • Rnd 1: Magic ring with 6 sc.
      • Rnd 2: Inc in each st around (12).
      • Rnd 3: Sc in next st, inc repeat around (18).
      • Continue increasing until you reach desired size for the shell.
    2. Body and Flippers:

      • Create separate pieces for the flippers according to your chosen design.
      • Follow the pattern to attach flippers securely to the shell.
    3. Head:

      • Start a new piece for the head combining the same method as the shell but adjusting the size as needed.
    4. Final Touches:

      • Attach eyes, mouth, and any additional details to personalize your turtle.

    Assembly and Finishing

    Once you have created all the parts:

    1. Sewing Pieces Together: Use a yarn needle to attach the head, flippers, and shell securely.
    2. Weaving in Ends: Carefully weave in any loose ends from your yarn to maintain a neat appearance.
    3. Add Decorative Details: Use embroidery thread to create patterns or features on your turtle.

    Baby-Specific Tips

    When making items for babies:

    • Select Soft Yarn: Choose plush or cotton yarn that won’t irritate delicate skin.
    • Check Attached Elements: Ensure that any small parts (like eyes or buttons) are securely attached to avoid choking hazards.
    • Sizing Considerations: Aim for a size that’s easy for little hands to hold.

    Customization Ideas

    You can further personalize your turtles by:

    • Altering colors to match nursery themes.
    • Adding initials or birth dates with embroidery.
    • Creating seasonal variants like Halloween or Christmas turtles.
    • Making matching baby accessories like blankets or hats.

    Common Problems & Troubleshooting

    If you face any issues while crocheting:

    • Uneven Tension: Keep practicing to hold your yarn consistently.
    • Incorrect Stitch Counts: Always recount your stitches; it helps to place markers.
    • Assembly Problems: Take your time when sewing pieces together for a polished look.

    Care Instructions

    For the care of your completed crochet turtles:

    • Washing: Hand wash in cold water with gentle soap.
    • Drying: Lay flat to dry; avoid wringing or twisting.
    • Storage: Keep in a cool, dry place to maintain shape and quality.

    Baby Safety Notes

    When crafting for babies:

    • Inspect Regularly: Handmade items should be regularly checked for wear and tear.
    • Avoid Small Detachable Parts: Always choose securely stitched elements.

    Frequently Asked Questions

    • Is this crochet baby project beginner-friendly?
      Yes, with basic crochet knowledge, it’s approachable for beginners.

    • What yarn is best for this baby crochet project?
      Medium-weight yarn is typically recommended for comfort and durability.

    • What size will the finished project be?
      The size varies by pattern; generally, they are about 6-12 inches.

    • Can I make it in different colors?
      Absolutely! Feel free to get creative with colors and patterns.

    • Is this suitable as a baby shower gift?
      Yes, these adorable turtles make fantastic, thoughtful gifts for new parents.

    Conclusion

    We hope you’re inspired to create your own adorable crochet turtles! This project offers the perfect blend of creativity and functionality, making it a lovely addition to any baby’s world. Happy crocheting!

  • Free Crochet Pattern: Quick and Easy Baby Booties 💖

    Free Crochet Pattern: Quick and Easy Baby Booties 💖

    Article

    Free Crochet Pattern: Quick and Easy Baby Booties 💖

    Free Crochet Pattern: Quick and Easy Baby Booties 💖

    If you’re searching for a delightful and straightforward crochet project, you’ve come to the right place! Our FREE Quick and Easy Baby Booties pattern is an absolute gem for both beginners and seasoned crocheters. These adorable little booties are cozy, charming, and a wonderful addition to any baby’s wardrobe. Perfectly suited for baby showers, newborn gifts, or simply to brighten up a nursery, you can whip up a pair in just a few hours. Plus, you’ll love that it comes with a VIDEO tutorial featuring simple and clear instructions to guide you along the way. Get ready to craft something truly special!

    Crochet Baby Project Overview

    • Skill Level: Beginner to experienced
    • Finished Size: Baby size (specific sizes can vary)
    • Yarn: Baby-safe yarn recommended
    • Crochet Hook: Appropriate size for yarn
    • Colors: Your choice!
    • Estimated Time: Just a few hours
    • Project Type: Footwear
    • Best Use: Everyday baby item or gift
    • Gift Suitability: Excellent for baby showers or newborns

    Materials You’ll Need

    • Yarn (baby-safe)
    • Appropriate crochet hook
    • Yarn needle
    • Scissors
    • Stitch markers (optional)
    • Any decorative items you may wish to add (like buttons or ribbon)

    Crochet Abbreviations

    • sc: single crochet
    • ch: chain
    • sl st: slip stitch
    • inc: increase (two stitches in one)

    Before You Start

    Before diving into your crochet baby booties, here are some practical tips to keep in mind:

    • Choose Baby-Safe Yarn: Opt for soft, hypoallergenic yarn to ensure comfort for the baby’s sensitive skin.
    • Check Gauge: While not always necessary for small items, checking your gauge can be crucial for fitting.
    • Consistent Tension: Keep your tension uniform throughout to prevent uneven booties.
    • Work in Continuous Rounds: If the pattern advises it, working in continuous rounds can enhance the look of your booties.

    Free Crochet Baby Pattern

    Main Piece

    Round 1: ch 4, join with a sl st to form a ring.
    Round 2: 6 sc in ring.
    Round 3: inc in each stitch around (12 sc).
    Round 4: (sc in next stitch, inc) repeat around (18 sc).
    Round 5: (sc in next 2 stitches, inc) repeat around (24 sc).
    Round 6–10: sc in each stitch around.
    Round 11: (sc in next 2 stitches, dec) repeat around (18 sc).
    Round 12: (sc in next stitch, dec) repeat around (12 sc).
    Round 13: dec around (6 sc).
    Fasten off and leave a long tail for sewing.

    Assembly and Finishing

    To assemble your baby booties, follow these steps:

    1. Sew the Sole: Align the sole with the main body and sew them together securely.
    2. Weave in Ends: Use a yarn needle to weave in any loose ends for a neat finish.
    3. Add Decorative Details: This is your chance to embellish with buttons, ribbons, or other fun accents!

    Baby-Specific Tips

    When making these booties for babies, consider the following tips:

    • Selecting Soft Yarn: Ensure the yarn is gentle on babies’ skin.
    • Check for Loose Ends: Double-check your stitches to eliminate any loose elements.
    • Fit: Make sure to account for a little growing room!

    Customization Ideas

    Feel free to customize your baby booties in various ways:

    • Colors: Choose colors to fit any nursery theme or personal preference.
    • Yarn Choices: Experiment with different textures for a unique feel.
    • Decorative Details: Personalize the booties with initials or fun shapes.

    Common Problems & Troubleshooting

    Here are some common issues you might encounter and how to solve them:

    • Incorrect Stitch Counts: Always double-check your counts after each round to avoid mistakes.
    • Uneven Tension: If your stitches are too tight or loose, practice maintaining consistent tension.
    • Assembly Issues: Take your time in sewing pieces together for a polished look.

    Care Instructions

    To keep your handmade baby booties looking great, follow these care guidelines:

    • Washing: Hand wash simply in lukewarm water to maintain shape.
    • Drying: Lay flat to dry, avoiding direct sunlight to prevent fading.

    Baby Safety Notes

    As these booties are made for babies, please pay careful attention to:

    • Secure Stitching: Make sure all parts are securely stitched, avoiding any choking hazards.
    • No Small Detachables: Avoid using small buttons or beads that could become loose.

    Remember, always inspect handmade items regularly for safety.

    Frequently Asked Questions

    Is this crochet baby project beginner-friendly?
    Yes, this pattern is designed for both beginners and experienced crocheters.

    What yarn is best for this baby crochet project?
    Use soft, baby-safe yarn that won’t irritate sensitive skin.

    What size will the finished project be?
    The finished booties are generally sized for infants, but sizes can be adjusted.

    Can I make it in different colors?
    Absolutely! Feel free to choose any colors that suit your style.

    Can I make the project larger or smaller?
    Yes, you can adjust the size by changing crochet hook size or yarn thickness.

    Is this suitable as a baby shower gift?
    Yes! These booties make a charming and thoughtful baby shower gift.

    How should I wash the finished crochet item?
    Hand wash in lukewarm water and lay flat to dry for best care.

    Conclusion

    We hope you’re excited to start your crochet baby booties project! This sweet pattern is not only enjoyable to make but also a lovely gift for any little one. Happy crocheting, and enjoy bringing warmth and comfort to babies with your handmade creations!

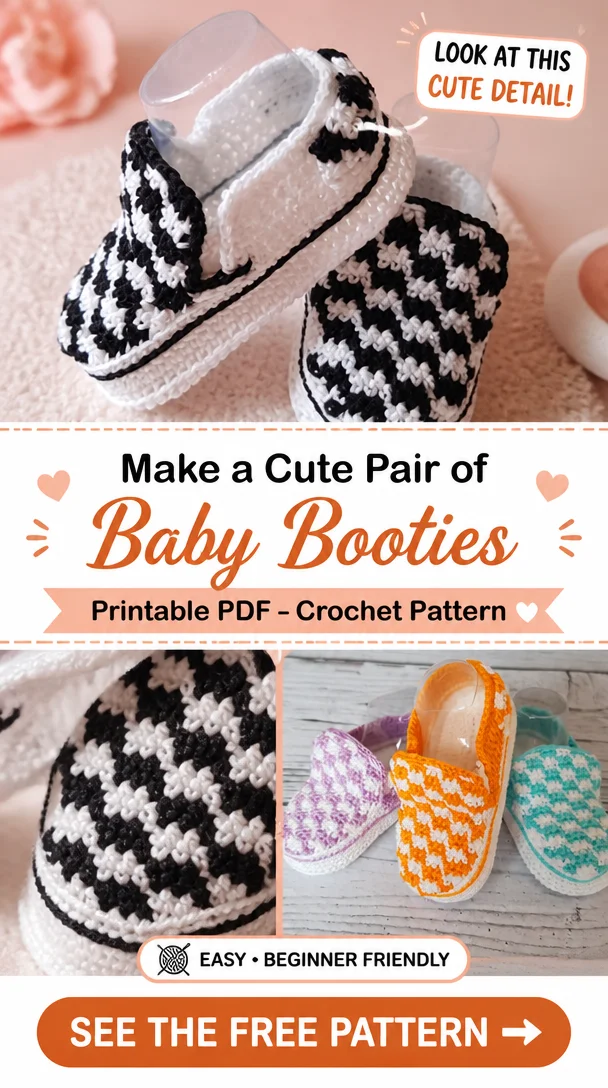
  • Make a Cute Pair of Baby Booties

    Make a Cute Pair of Baby Booties

    Article

    Make a Cute Pair of Baby Booties

    Make a Cute Pair of Baby Booties

    Creating a lovely pair of baby booties is a delightful crochet project perfect for both beginners and seasoned crafters. These adorable little shoes are not only practical as footwear for infants, but they also make a heartfelt and personal baby gift. Ideal for baby showers or as a cherished keepsake, handmade booties add a touch of warmth to any nursery. Imagine the joy of giving a unique crochet baby gift that’s made with love, ensuring that little feet are cozy and stylish. Whether you’re looking to express your creativity or create a memorable gift for a loved one, this project is sure to please.

    Crochet Baby Project Overview

    • Skill Level: Beginner
    • Finished Size: Suitable for newborns
    • Yarn: Worsted weight yarn
    • Crochet Hook: Size H (5.0 mm)
    • Colors: Customizable
    • Estimated Time: 2-3 hours
    • Project Type: Baby booties
    • Best Use: Everyday baby wear and special occasions
    • Gift Suitability: Perfect for baby showers, newborn gifts, and holiday presents

    Materials You’ll Need

    • Worsted weight yarn (any color of your choice)
    • Size H (5.0 mm) crochet hook
    • Yarn needle
    • Scissors
    • Stitch markers (optional)
    • Additional decorative items (e.g., buttons or ribbons) if desired

    Crochet Abbreviations

    • ch: chain
    • sl st: slip stitch
    • st: stitch
    • sc: single crochet
    • dc: double crochet

    Before You Start

    Before diving into this adorable crochet project, ensure you check your stitch counts and maintain consistent tension throughout. Using a baby-safe yarn is essential to avoid any irritation for delicate skin. As you work, keep in mind that the booties may stretch slightly, so choose an appropriate size to fit the intended recipient comfortably.

    Free Crochet Baby Pattern

    Main Piece

    Starting with the sole:

    1. Chain 12.
    2. Row 1: Work 1 sc in the 2nd ch from the hook and in each ch across. Turn. (11 sc)
    3. Row 2: Ch 1, 2 sc in first st, sc 7, 2 sc in last st. Turn. (13 sc)
    4. Row 3: Ch 1, 2 sc in first st, sc across, 2 sc in last st. Turn. (15 sc)
    5. Row 4: Ch 1, 2 sc in first st, sc across, 2 sc in last st. Turn. (17 sc)
    6. Continue to increase until the desired sole length is reached.

    Body

    1. Working up from the sole:
    2. Ch 1, sc around the edge of the sole for a complete round.
    3. Increase or decrease as necessary to shape the sides of the booties.
    4. Complete until the desired height is achieved, usually around 4-5 rows.

    Finishing

    1. Fasten off and weave in any ends.
    2. Optionally, add buttons or ribbons for embellishment.

    Assembly and Finishing

    To finish your booties, sew any additional decorations securely in place. Weave in all ends to ensure a neat appearance. If you’d like to create a matching set, simply repeat the above steps for a second bootie.

    Baby-Specific Tips

    When making booties for infants, always opt for soft, gentle yarn that won’t irritate sensitive skin. Make sure that all seams are secure, and inspect the booties regularly for any signs of wear. It’s also wise to avoid embellishments that could pose a choking hazard, ensuring a safe and functional finish.

    Customization Ideas

    • Explore different color combinations to match nursery themes.
    • Incorporate initials or names with embroidery for a personal touch.
    • Use alternate yarns like cotton for a summer-friendly version.
    • Create matching accessories like hats or blankets for a complete gift set.

    Common Problems & Troubleshooting

    • Incorrect stitch counts: Always recount to verify accuracy before proceeding.
    • Uneven tension: Practice maintaining an even tension throughout your work, adjusting your grip if necessary.
    • Sizing issues: Refer to the pattern frequently and adjust hook size if needed.

    Care Instructions

    To keep your crochet baby booties looking their best, hand wash in cold water, and lay flat to dry. This will help maintain their shape and prevent any damage from the washing machine.

    Baby Safety Notes

    When creating handmade baby items, inspect them routinely for small detaching parts. Items like buttons and ribbons should be securely attached to avoid any safety hazards. Always review your work to ensure it meets safe crafting standards for infants.

    Frequently Asked Questions

    • Is this crochet baby project beginner-friendly? Yes, it’s great for novices!
    • What yarn is best for this baby crochet project? Choose a soft, baby-safe yarn like acrylic or cotton.
    • What size will the finished project be? Designed for newborns, fitting most babies within their first months.
    • Can I make it in different colors? Absolutely! Feel free to choose any color that suits your style.
    • Can I make the project larger or smaller? Yes, simply adjust your starting chain and stitch counts as needed.
    • Is this suitable as a baby shower gift? It makes a wonderful gift for any baby occasion.
    • How should I wash the finished crochet item? Hand wash with cold water and allow to air dry.

    Conclusion

    Crocheting a pair of cute baby booties is a delightful way to express creativity while gifting something special and practical for a newborn. With this easy-to-follow pattern, you can make custom booties that are both stylish and cozy. So grab your yarn and hook, and start crafting a unique handmade baby gift today!

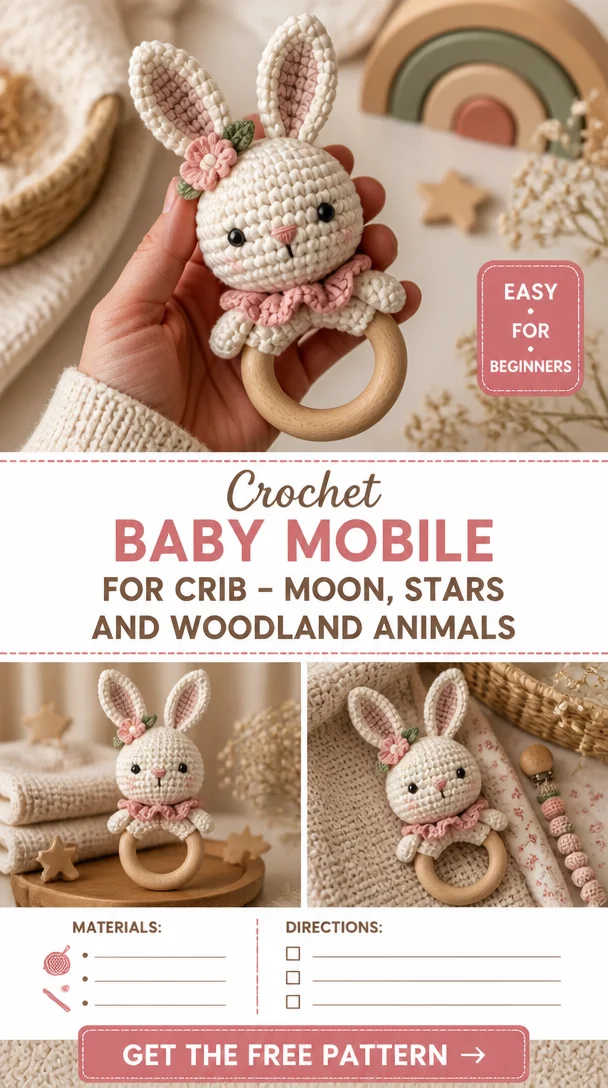
  • Crochet Baby Mobile for Crib – Moon, Stars and Woodland Animals

    Crochet Baby Mobile for Crib – Moon, Stars and Woodland Animals

    Article

    Crochet Baby Mobile for Crib – Moon, Stars and Woodland Animals

    Crochet Baby Mobile for Crib – Moon, Stars and Woodland Animals

    If you’re looking for a charming addition to your baby’s nursery, a handmade crochet baby mobile featuring a crescent moon, soft clouds, twinkling stars, and adorable sleeping woodland animals is the perfect project! This delightful piece not only enhances the room’s decor but also provides visual stimulation for your little one. Whether you’re an experienced crocheter or just starting your crafting journey, this whimsical mobile is sure to be a labor of love. It makes a wonderful baby shower gift, a heartfelt newborn keepsake, or a decorative item for your cozy baby room.

    Crochet Baby Project Overview

    • Skill Level: Intermediate
    • Finished Size: Approximately 24 inches in diameter (including hanging elements)
    • Yarn: Soft cotton or baby-safe yarn for a gentle touch
    • Crochet Hook: Size G (4.0 mm)
    • Colors: Various pastels and bright colors for a cheerful appearance
    • Estimated Time: 8-10 hours
    • Project Type: Mobile
    • Best Use: Nursery decor, gift for new parents
    • Gift Suitability: Ideal baby shower or newborn gift

    Materials You’ll Need

    • Soft cotton yarn in different colors
    • Crochet hook (G/4.0 mm)
    • Craft stuffing
    • Safety eyes
    • Ribbon (for hanging)
    • Yarn needle
    • Scissors
    • Stitch markers
    • Embroidery thread (optional for details)

    Crochet Abbreviations

    • ch: chain
    • sc: single crochet
    • dc: double crochet
    • st: stitch
    • inv dec: invisible decrease

    Before You Start

    Before getting started, consider the following tips for a successful crochet mobile:

    • Choose Baby-Safe Yarn: Opt for hypoallergenic, soft yarn to ensure your baby’s comfort.
    • Check Your Stitches: Regularly check your stitch counts as you work to avoid discrepancies.
    • Prepare for Assembly: After crocheting all elements, prepare them for easy assembly by weaving in ends and ensuring they are securely stuffed and stitched.

    Free Crochet Baby Pattern

    Main Piece: Crescent Moon

    1. Start with a Magic Ring: Create a magic ring and ch 1.
    2. Round 1: 6 sc in the ring (6).
    3. Round 2: 2 sc in each st (12).
    4. Round 3: 1 sc, 2 sc in next st repeat (18).
    5. Round 4: 2 sc, 2 sc in next st repeat (24).
    6. Shaping the Moon: Continue to add rounds by increasing until you achieve a crescent shape, filling with stuffing as you go.

    Stars (Make 3)

    1. Start with a Magic Ring: Create a magic ring.
    2. Round 1: 5 sc in the ring.
    3. Round 2: Switch to dc to create star points (5 points).
    4. Fasten off: Leave a long tail for attaching.

    Woodland Animals (Choice of 3)

    • Each animal (e.g., owl, fox, bunny) will have similar basic structure:
    1. Head and Body: Begin with a magic ring and work in rounds to form the head and body shape.
    2. Ears and Legs: Utilize basic crochet shapes for ears and appendages.
    3. Finish with Eyes: Sew on safety eyes or embroider details.

    Assembly and Finishing

    1. Attach the Moon: Securely stitch the crescent moon to the center of the mobile frame.
    2. Secure Stars and Animals: Using the long tails left from previous pieces, attach stars and woodland animals at varying heights for visual interest.
    3. Weave in Ends: Ensure all loose yarn tails are carefully woven in to prevent unraveling.

    Baby-Specific Tips

    • Choose Soft Yarn: Ensure all yarn types are gentle to the touch, avoiding any scratchy or rough materials.
    • Check for Secure Elements: Inspect all attached items to guarantee they are securely stitched and safe.
    • Regular Inspection: Handmade items should be checked frequently for wear, especially if used near babies.

    Customization Ideas

    • Vary Colors: Choose colors that match your nursery theme.
    • Additional Characters: Add more woodland creatures like deer or raccoons.
    • Initial Personalization: Embroider the baby’s initials on one of the animals.
    • Seasonal Variations: Change colors or themes for different seasons or holidays.

    Common Problems & Troubleshooting

    • Incorrect Stitch Count: Revisit your rounds and confirm you haven’t missed any increases or decreases.
    • Uneven Tension: Practice maintaining consistent tension throughout the project to ensure uniformity.
    • Assembly Issues: If pieces don’t align, consider adjusting the attachment points or re-shaping elements.

    Care Instructions

    To maintain your crochet mobile, wash it gently by hand with mild soap, and lay it flat to dry. Storing it away from direct sunlight will help maintain the fabric’s colors.

    Baby Safety Notes

    When crafting baby items, always keep safety in mind. Regularly check for secure stitching, especially around safety eyes or any small detachable parts. Ensure no elements pose choking hazards, and regularly inspect for wear and tears.

    Frequently Asked Questions

    • Is this crochet baby project beginner-friendly?
      This project is ideal for those with some crochet experience but not suited for absolute beginners.

    • What yarn is best for this baby crochet project?
      Soft, baby-safe cotton yarn is recommended for its gentleness and safety.

    • What size will the finished project be?
      The mobile will be approximately 24 inches in diameter when completed.

    • Can I make it in different colors?
      Absolutely! Feel free to customize colors to match any nursery decor.

    • Can I make the project larger or smaller?
      Yes, adjust the size by modifying yarn weights and hook sizes.

    • Is this suitable as a baby shower gift?
      It makes a perfect baby shower gift, adding a personal touch to nursery decor.

    • How should I wash the finished crochet item?
      Hand wash gently and lay flat to dry for best results.

    Conclusion

    Creating a crochet baby mobile adorned with a moon, stars, and woodland animals is not just an artistic endeavor but a labor of love that enhances your little one’s nursery. It offers joy not only to the child but also to the crafter. Gather your materials and indulge in this creative project that will surely become a treasured keepsake in your family.

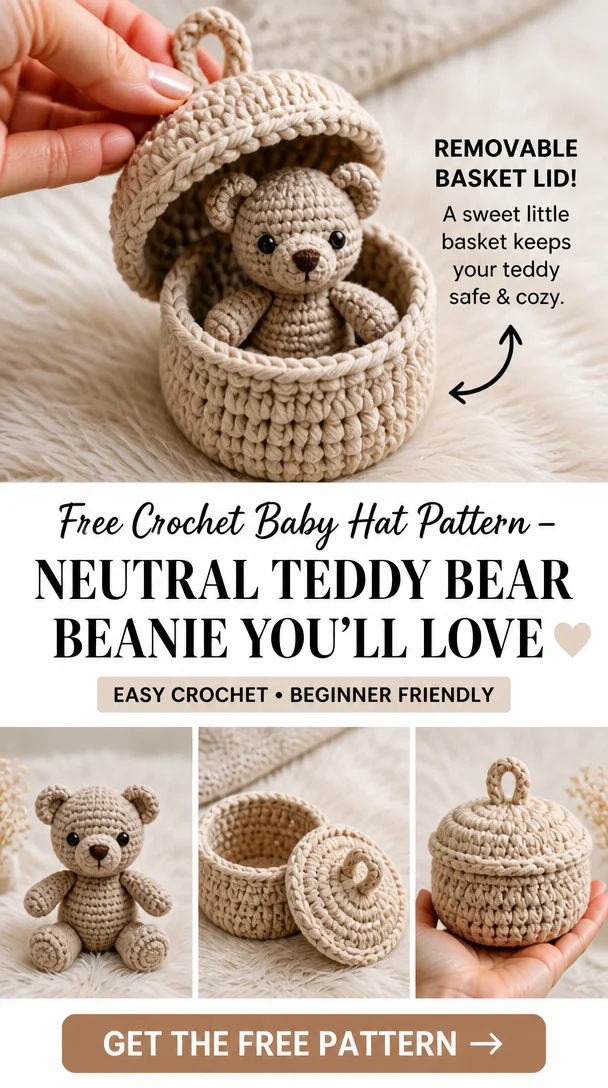
  • Free Crochet Baby Hat Pattern – Neutral Teddy Bear Beanie You’ll Love

    Free Crochet Baby Hat Pattern – Neutral Teddy Bear Beanie You’ll Love

    Article

    Free Crochet Baby Hat Pattern – Neutral Teddy Bear Beanie You’ll Love

    Neutral Teddy Bear Baby Beanie Free Crochet Pattern

    Creating handmade gifts for little ones is a heartfelt project that many crochet enthusiasts cherish. This Neutral Teddy Bear Baby Beanie is a delightful and practical piece that adds warmth and charm to any newborn’s wardrobe. With adorable bear ears and a chunky design, this beanie not only keeps babies snug during chilly outings but also makes for a perfect gift at baby showers or newborn welcomes. This project is ideal for crafters of all skill levels, particularly those looking for a quick and satisfying crochet project. Whether for personal use or as a sweet keepsake, the Neutral Teddy Bear Baby Beanie is sure to be treasured.

    Crochet Baby Project Overview

    • Skill Level: Easy
    • Finished Size: Fits newborns to three months
    • Yarn: Chunky yarn
    • Crochet Hook: Size recommended for chunky yarn
    • Colors: Neutral shades (customizable)
    • Estimated Time: Works up in just a few hours
    • Project Type: Hat/Beanie
    • Best Use: Everyday wear, baby shower gift, nursery item
    • Gift Suitability: Perfect for baby showers or as a thoughtful baby gift

    Materials You’ll Need

    • Chunky yarn (in a neutral shade)
    • Appropriate crochet hook (size per yarn label)
    • Yarn needle
    • Scissors
    • Stitch markers (optional)

    Crochet Abbreviations

    • SC: Single Crochet
    • CH: Chain
    • SL ST: Slip Stitch
    • STS: Stitches
    • RND: Round

    Before You Start

    Before you begin crafting this adorable beanie, consider the following preparation tips:

    • Check your yarn label for gauge recommendations to ensure a snug fit.
    • Select a baby-safe yarn that’s soft against delicate skin.
    • Keep your tension consistent for even stitches.
    • Familiarize yourself with single crochet, as it is used throughout this project.

    Free Crochet Baby Pattern

    Main Piece

    Round 1: CH 4, join with a SL ST to form a ring.
    Round 2: CH 1, 10 SC into the ring (10 STS).
    Round 3: CH 1, 2 SC in each ST (20 STS).
    Round 4: CH 1, 1 SC in the next ST, 2 SC in the following ST, repeat across (30 STS).
    Round 5-12: CH 1, SC in each ST around (30 STS).
    Round 13: CH 1, 1 SC in the next 5 STS, decrease by 1 (2 STS together), repeat until the end (24 STS).
    Round 14: CH 1, continue SC in each ST (24 STS).
    Round 15: Repeat Round 13 (20 STS).
    Round 16: Repeat Round 14 (20 STS).
    Round 17: CH 1, SC in the next 4 STS, decrease (15 STS).
    Round 18: Work SC in 15 STS, then finish off and weave in the ends.

    Ears (make 2)

    Round 1: CH 2, 6 SC in the second CH from the hook (6 STS).
    Round 2: CH 1, 2 SC in each ST (12 STS).
    Round 3: SC in each ST around (12 STS).
    Finish off: Leave a tail for sewing. Secure and weave in ends.

    Assembly and Finishing

    1. Attach the ears to the top of the beanie; use the yarn tail to sew them securely in place.
    2. Weave in all loose ends and secure them properly.
    3. For a tidy finish, ensure all seams are hidden and well-stitched.

    Baby-Specific Tips

    • Always choose soft, hypoallergenic yarn to ensure comfort.
    • Check all seams and attached elements for security to avoid choking hazards.
    • Consider a snug fit since babies grow quickly; adjust sizing based on your yarn type.
    • When washing, opt for gentle cycles to maintain the integrity of the stitches.

    Customization Ideas

    • Experiment with different neutral shades or pastels based on personal preference.
    • Add embroidery or little buttons (securely stitched) for personalization.
    • Create a matching set with a baby blanket or booties to complete the look.

    Common Problems & Troubleshooting

    • Incorrect Stitch Counts: Always count your stitches at the end of each round to catch errors early.
    • Uneven Tension: Maintain a consistent grip on your hook and yarn to avoid size discrepancies.
    • Sizing Issues: If the beanie seems too large or small, adjust your hook size or yarn tension as needed.

    Care Instructions

    To keep your beanie in great condition:

    • Washing: Hand wash in cool water; avoid agitating too vigorously.
    • Drying: Lay flat to dry or use a gentle cycle if machine washing.
    • Storage: Keep in a dry place, away from direct sunlight to avoid fading.

    Baby Safety Notes

    • Regularly inspect the beanie for any wear and tear, especially if it includes embellishments that could pose a choking hazard.
    • Ensure all attached pieces are securely fastened and double-check that any sewn elements, such as buttons, are firmly stitched on.

    Frequently Asked Questions

    • Is this crochet baby project beginner-friendly?
      Yes! The pattern uses straightforward single crochet stitches, making it perfect for beginners.

    • What yarn is best for this baby crochet project?
      A soft, chunky yarn that is easy to work with and gentle on baby’s skin is recommended.

    • What size will the finished project be?
      The beanie fits newborns to three months comfortably.

    • Can I make it in different colors?
      Absolutely! Feel free to customize the colors to suit your taste or the nursery theme.

    • Can I make the project larger or smaller?
      Adjusting your hook size or the number of stitches will help you modify the size as needed.

    • Is this suitable as a baby shower gift?
      Yes, it makes a lovely, thoughtful gift for new parents.

    • How should I wash the finished crochet item?
      Hand washing is best; lay flat to dry to maintain shape.

    Conclusion

    Crafting the Neutral Teddy Bear Baby Beanie is a joyful experience that results in a charming accessory for a little one. Ideal for gifting or personal use, this project combines practicality with adorable aesthetics. We encourage you to try making this beanie and enjoy the warmth and love that handcrafted gifts can bring!

  • Mint Green Rose Baby Romper Free Crochet Pattern

    Mint Green Rose Baby Romper Free Crochet Pattern

    Article

    Mint Green Rose Baby Romper Free Crochet Pattern

    Mint Green Rose Baby Romper Free Crochet Pattern

    Embark on a delightful crochet journey with our Mint Green Rose Baby Romper Free Crochet Pattern! This charming romper not only offers a practical outfit for your little one but also serves as a treasured keepsake that you can cherish forever. Designed for both novice and experienced crocheters, this project is perfect for anyone seeking easy crochet ideas to create something stunning. Whether you’re preparing for a baby shower, looking for a unique newborn gift, or making an adorable addition to a nursery, this romper is sure to impress. Let your creativity flourish as you work on this beautiful creation, and enjoy the rewarding experience of crafting a lovely handmade piece for your baby.

    Crochet Baby Project Overview

    • Skill Level: Beginner-friendly
    • Finished Size: Ideal for infants
    • Yarn: Soft, baby-safe yarn
    • Crochet Hook: Size appropriate for yarn used
    • Colors: Mint green with rose accents
    • Estimated Time: A few hours
    • Project Type: Baby romper
    • Best Use: Everyday wear or special occasions
    • Gift Suitability: Perfect as a baby shower gift or for newborns

    Materials You’ll Need

    • Soft baby-safe yarn in mint green
    • Complementary yarn for rose accents
    • Crochet hook (size appropriate for your yarn)
    • Yarn needle
    • Scissors
    • Stitch markers (optional)

    Crochet Abbreviations

    • CH: Chain
    • SC: Single Crochet
    • DC: Double Crochet
    • ST: Stitch
    • RND: Round

    Before You Start

    Before diving into this pattern, here are a few tips to help you prepare:

    • Choose Baby-Safe Yarn: Make sure to select yarn that is gentle against sensitive baby skin. Always check labels for baby-safe options.
    • Check Your Gauge: While it’s not critical for baby garments, keeping a consistent tension will help the garment fit better.
    • Keep Tension Consistent: Maintaining even tension throughout the project will ensure a polished look.

    Free Crochet Baby Pattern

    Main Piece

    1. Foundation Chain: CH to the length needed for the romper base.
    2. Body:
      • Start your first round with SC into the foundation chain.
      • Continue crocheting rounds until the desired length is reached.

    Decorative Details

    1. Rose Accents:
      • Using the contrasting color, incorporate rose motifs by working in the designated areas of the romper.
      • Attach any embellishments securely.

    Assembly and Finishing

    Once all pieces are crocheted, follow these steps:

    • Join Edges: Use slip stitches or SC to join the sides of the romper.
    • Weave in Ends: Make sure to weave in all loose ends for a clean finish.
    • Shape and Final Touches: Ensure that the romper is shaped correctly and adjust any areas that need fixing.

    Baby-Specific Tips

    When crafting this romper, consider the following:

    • Choose Soft Yarn: Always choose soft, gentle materials to protect delicate baby skin.
    • Check Seams: Ensure all seams are secure, so no loose threads could snag or irritate.
    • Washing Considerations: Ensure the yarn is machine washable for easy care, keeping the finished item easy to maintain.

    Customization Ideas

    Get creative with your romper by considering these customization options:

    • Changing Colors: Experiment with different color combinations to suit any nursery theme.
    • Adding Initials: Personalize the romper with the baby’s initials for a special touch.
    • Decorative Features: Enhance with ruffles, bows, or other decorative elements to create a unique garment.

    Common Problems & Troubleshooting

    • Incorrect Stitch Counts: Double-check your stitch counts after each round to avoid discrepancies.
    • Uneven Tension: Try not to crochet too tightly. A consistent grip will yield more uniform results.
    • Sizing Issues: If the romper is too small or large, adapt your chain foundation or adjust the stitch count.

    Care Instructions

    To properly care for your finished crochet item:

    • Washing: Hand wash or machine wash on gentle cycle.
    • Drying: Air dry flat to maintain the shape.
    • Storage: Store in a cool, dry place to prevent any damage.

    Baby Safety Notes

    As this romper is intended for a baby, remember to:

    • Inspect Regularly: Check the garment for loose parts that could pose a choking hazard.
    • Secure Stitching: Ensure all stitches are tightly secured to avoid unraveling.
    • Age-Appropriate Use: Only provide the garment to babies who can safely wear it.

    Frequently Asked Questions

    • Is this crochet baby project beginner-friendly? Yes, it’s designed for beginners.
    • What yarn is best for this baby crochet project? Soft, baby-safe yarn is recommended.
    • What size will the finished project be? Made for infants, size will vary based on yarn and tension.
    • Can I make it in different colors? Absolutely! Feel free to experiment with different colors.
    • How should I wash the finished crochet item? Hand wash or use a gentle cycle in the machine.

    Conclusion

    We hope this Mint Green Rose Baby Romper Free Crochet Pattern inspires you to create something beautiful for your little one. Enjoy the process of crocheting this charming romper and take pride in knowing you’ve crafted a unique piece that can be cherished for years to come. Happy crocheting!

  • Free Crochet Baby Blanket Pattern – A Cozy Keepsake for Baby

    Free Crochet Baby Blanket Pattern – A Cozy Keepsake for Baby

    Article

    Free Crochet Baby Blanket Pattern – A Cozy Keepsake for Baby

    Our Favorite Sweet Crochet Lovey Ideas and Free Patterns

    Crochet loveys are a delightful blend of comfort and creativity, making them the perfect addition to any baby’s nursery. These soft, hand-crafted pieces not only offer comfort to little ones but also serve as a cherished keepsake they can hold onto as they grow. Whether you’re a seasoned crocheter or a beginner, you’ll find joy in making these sweet crochet loveys. From baby shower gifts to newborn presents, these loveys will melt hearts with their charm and warmth, making them a gift appreciated by both parents and babies alike.

    Crochet Baby Project Overview

    • Skill Level: Beginner to Intermediate
    • Finished Size: Approximately 12 inches
    • Yarn: Baby-safe cotton or acrylic blend
    • Crochet Hook: Size G/6 (4.0 mm)
    • Colors: Any soft pastel or bright hues
    • Estimated Time: 3-5 hours
    • Project Type: Lovey
    • Best Use: Comfort item for babies
    • Gift Suitability: Great for baby showers, newborn gifts, or nursery decor

    Materials You’ll Need

    • Yarn (baby-safe cotton or acrylic)
    • Crochet hook (size G/6)
    • Stuffing (polyester or cotton)
    • Safety eyes (if applicable)
    • Ribbon (optional)
    • Yarn needle
    • Scissors
    • Stitch markers

    Crochet Abbreviations

    • CH: Chain
    • SC: Single Crochet
    • INC: Increase
    • DEC: Decrease
    • RND: Round

    Before You Start

    Before diving into your crochet lovey project, make sure to choose a soft, baby-safe yarn to ensure comfort for the little one. It’s essential to keep your tension consistent and check your gauge if you’re adjusting your pattern. If you’re using safety eyes, ensure they are securely fastened to avoid any risk. Lastly, prepare your workspace by having all materials handy to keep your project organized.

    Free Crochet Baby Pattern

    Main Piece

    Round 1: CH 2, 6 SC in the first CH.
    Round 2: INC in each SC around (12 SC).
    Round 3: (1 SC, INC) around (18 SC).
    Round 4-6: SC around (18 SC).

    Head

    Round 1: CH 2, 6 SC in the first CH.
    Round 2: INC in each SC around (12 SC).
    Round 3: (1 SC, INC) around (18 SC).
    Round 4-7: SC around (18 SC).

    Finish off, leaving a long tail for attaching to the body.

    Assembly and Finishing

    To assemble the lovey, sew the head securely onto the main piece using the long tail left from the head. Make sure to weave in any loose ends and shape the piece as needed. For added charm, you can embroider facial features or attach decorative details, or buttons as desired.

    Baby-Specific Tips

    When crafting your crochet lovey, always opt for soft and plush yarn to avoid any irritation on baby’s skin. Regularly check that all seams are tight and ensure any attached elements, like eyes or embellishments, are securely sewn to prevent detachment. Scour your work for any loose threads that could become a choking hazard.

    Customization Ideas

    Get creative with your lovey! Here are a few customization ideas:

    • Use vibrant yarn colors to match a nursery theme.
    • Add initials or names using embroidery.
    • Experiment with various shapes and sizes to personalize the gift.
    • Create seasonal variations, like holiday-themed loveys or animal shapes.
    • Pair the lovey with matching baby accessories like blankets or hats.

    Common Problems & Troubleshooting

    • Incorrect stitch counts: Carefully count your stitches often, especially after increases or decreases.
    • Uneven tension: Practice tension control by switching yarn weights until you find a comfortable balance.
    • Sizing issues: Ensure your hook size matches the recommended size for your yarn to avoid discrepancies.
    • Assembly problems: Lay out all components before assembly to visualize the final piece, ensuring everything fits properly.

    Care Instructions

    To maintain your crochet lovey, hand wash in cold water and lay flat to dry. Always store it in a dry area to keep its shape intact, and avoid using bleach or harsh detergents to preserve the colors and soft texture.

    Baby Safety Notes

    As always with handmade items intended for babies, ensure there are no small or detachable parts that could pose a choking hazard. Regularly check the item for wear and tear, especially in areas where components are sewn together, to guarantee safety during use.

    Frequently Asked Questions

    • Is this crochet baby project beginner-friendly?
      Yes, with clear rounds and simple stitches, it’s suitable for beginners!

    • What yarn is best for this baby crochet project?
      A soft cotton or acrylic blend is ideal for comfort and washability.

    • What size will the finished project be?
      The finished lovey will measure approximately 12 inches.

    • Can I make it in different colors?
      Absolutely! Feel free to experiment with colors that suit your nursery theme.

    • Can I make the project larger or smaller?
      You can adjust the number of rounds to increase or decrease the size.

    • Is this suitable as a baby shower gift?
      Yes, it’s a charming and unique gift idea for new parents!

    • How should I wash the finished crochet item?
      Hand wash in cold water and lay flat to dry to maintain its shape.

    Conclusion

    There’s nothing more heartwarming than gifting a handmade crochet lovey, made with love and creativity. Whether you’re making it for your child or a loved one’s new addition, the joy and comfort these sweet crochet loveys provide are truly priceless. Grab your yarn and get started on your next crochet adventure!

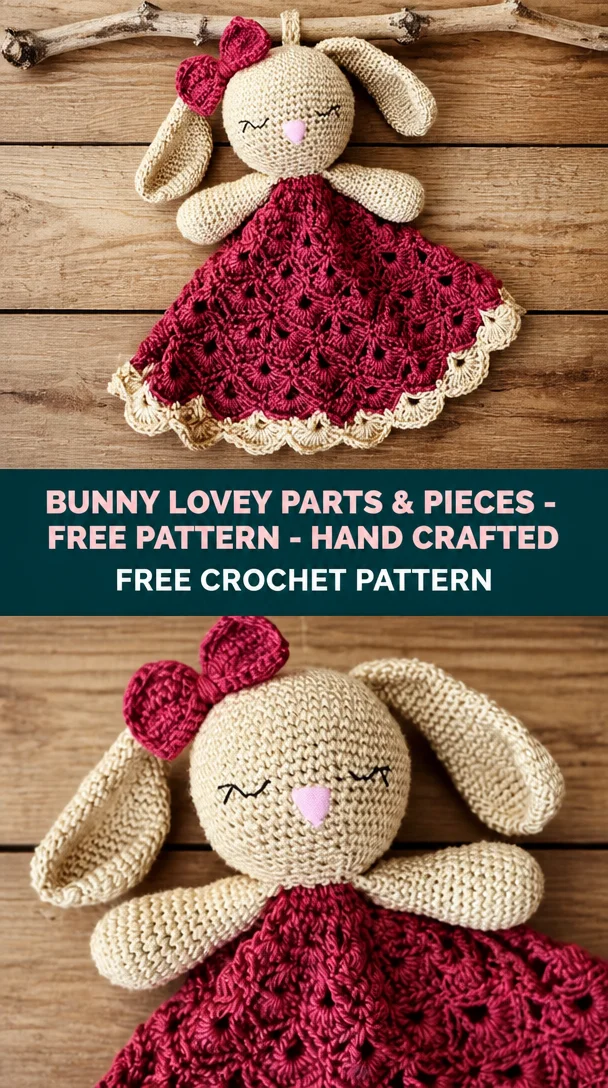
  • Bunny Lovey Parts & Pieces – Free Pattern – Hand Crafted

    Bunny Lovey Parts & Pieces – Free Pattern – Hand Crafted

    Article

    Bunny Lovey Parts & Pieces – Free Pattern – Hand Crafted

    Bunny Lovey Parts & Pieces – Free Pattern – Hand Crafted

    Creating a comforting Bunny Lovey Parts & Pieces – Free Pattern is a delightful way to bring joy to little ones. This charming crochet project is perfect for both beginners and seasoned crafters looking to make something special. Ideal as a baby shower gift, newborn keepsake, or an everyday nursery item, this lovey can provide comfort and security to babies as they grow. With its cuddly design, it’s sure to become a cherished companion for any child. If you’re searching for a meaningful project that combines creativity with warmth, this Bunny Lovey is the perfect fit for your next crochet adventure!

    Crochet Baby Project Overview

    • Skill Level: Beginner to Intermediate
    • Finished Size: Approximately 12 inches (30 cm)
    • Yarn: Soft, baby-friendly yarn
    • Crochet Hook: Size H (5 mm)
    • Colors: Main color for the body, contrasting color for details
    • Estimated Time: 4-6 hours
    • Project Type: Toy/Lovey
    • Best Use: Comfort item for babies
    • Gift Suitability: Perfect for baby showers and newborn gifts

    Materials You’ll Need

    • Soft baby-friendly yarn
    • Crochet hook (size H/5 mm)
    • Stuffing (suitable for toys)
    • Safety eyes (if desired)
    • Embroidery thread (for facial details)
    • Yarn needle
    • Scissors
    • Stitch markers (optional)

    Crochet Abbreviations

    • ch: chain
    • sc: single crochet
    • dc: double crochet
    • sl st: slip stitch
    • inc: increase
    • dec: decrease
    • st(s): stitch(es)

    Before You Start

    Before diving into your Bunny Lovey, remember to choose baby-safe yarn that is soft and free from harmful chemicals. It’s a good idea to check your gauge, especially if you want a specific size. Keep your tension consistent to ensure your stitches are even throughout the project. Prepare your pieces beforehand, so they are ready for assembly when you finish each section.

    Free Crochet Baby Pattern

    Main Piece

    Start by creating the base of your lovey.

    Round 1: Make a magic ring, and create 6 sc in the ring.
    Round 2: Inc in each st around (12 sts).
    Round 3: Sc in next st, inc in next st; repeat around (18 sts).
    Round 4: Sc in next 2 sts, inc in next st; repeat around (24 sts).

    Continue working in rounds until you reach the desired size.

    Ears

    For the bunny ears, use the same yarn.

    Row 1: Ch 10, sc in second ch from hook, sc across (9 sts).
    Row 2: Ch 1, turn, inc in first st, sc across, inc in last st (11 sts).

    Make a second ear in the same manner.

    Assembly and Finishing

    1. Stuff the main piece lightly and sew the ears onto the top of the head using the yarn needle.
    2. Attach safety eyes securely, or use embroidery to create the eyes.
    3. Weave in excess yarn on the backside of the lovey.
    4. Consider adding a decorative bow or a personal touch for a unique finish.

    Baby-Specific Tips

    When crafting for babies, it’s essential to use soft yarn that won’t irritate delicate skin. Ensure that all seams are checked and securely stitched; no loose parts should be within reach. Choosing the right size is important, as well as washing the lovey in gentle detergent suitable for baby items.

    Customization Ideas

    • Experiment with different colors and yarn types to create a unique Bunny Lovey.
    • Consider adding initials or nursery themes.
    • Use pastel colors for a softer appearance or bright colors for a fun design.
    • Create matching baby accessories, such as booties or hats, for a complete set.

    Common Problems & Troubleshooting

    • Incorrect stitch counts: Always count your stitches at the end of each round; use stitch markers if needed.
    • Uneven tension: Practice consistent tension, and adjust your grip on the yarn if necessary.
    • Sewing pieces together: Take your time to stitch pieces securely to avoid any gaps.

    Care Instructions

    To care for your Bunny Lovey, gently hand wash it in cold water, lay it flat to dry, and avoid bleach to maintain its soft texture. Store in a cool, dry place to keep it fresh for baby.

    Baby Safety Notes

    Keep a close eye on the attachment of any small parts, like safety eyes or embellishments. Regularly inspect the lovey for wear and tear, and only use it under proper supervision to ensure it’s safe for the baby.

    Frequently Asked Questions

    • Is this crochet baby project beginner-friendly?
      Yes! It’s suitable for beginners with basic crochet skills.

    • What yarn is best for this baby crochet project?
      Soft, baby-safe yarn with no harsh chemicals is recommended.

    • What size will the finished project be?
      The finished Bunny Lovey is approximately 12 inches.

    • Can I make it in different colors?
      Absolutely! Feel free to choose any colors you like.

    • Can I make the project larger or smaller?
      Yes, by adjusting your gauge or the number of rounds.

    • Is this suitable as a baby shower gift?
      Definitely! It’s a thoughtful and handmade gift.

    • How should I wash the finished crochet item?
      Hand wash in cold water and lay flat to dry.

    Conclusion

    Crafting a Bunny Lovey is a rewarding and enjoyable project that results in a precious keepsake for little ones. With its soft design and warmth, this lovey is sure to provide comfort to babies and will be loved for years to come. Gather your materials and start crocheting; your little masterpiece awaits!

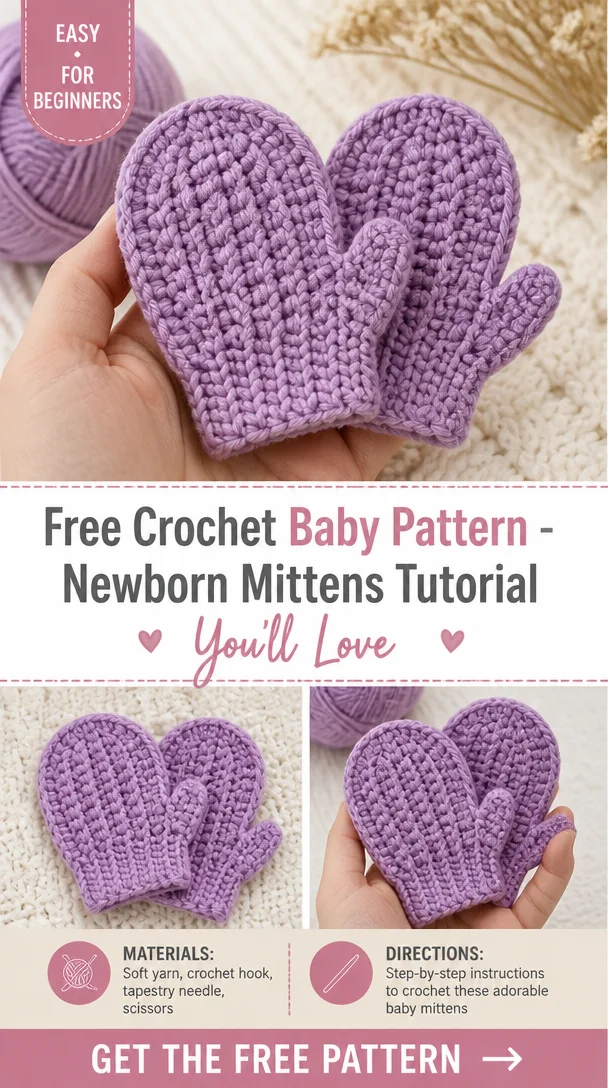
  • Free Crochet Baby Pattern – Newborn Mittens Tutorial You’ll Love

    Free Crochet Baby Pattern – Newborn Mittens Tutorial You’ll Love

    Article

    Free Crochet Baby Pattern – Newborn Mittens Tutorial You’ll Love

    Crochet Newborn Mittens Tutorial Free Pattern

    Welcome to the delightful world of crochet! Today, we’re diving into a charming project that every crochet enthusiast will love: tiny crochet newborn mittens. These adorable mittens are perfect for newborns, boasting a comfy fit without a thumb, ensuring they stay on little hands effortlessly. Whether you’re looking for a heartfelt baby shower gift, a thoughtful newborn present, or a keepsake for your own nursery, these mittens are a sweet addition to any little outfit. Let’s get crocheting!

    Crochet Baby Project Overview

    • Skill Level: Easy
    • Finished Size: Newborn
    • Yarn: Soft acrylic or cotton yarn
    • Crochet Hook: Optionally, a size G (4mm) hook
    • Colors: Your choice of baby-friendly colors
    • Estimated Time: About 1 hour
    • Project Type: Baby accessory
    • Best Use: Everyday wear or gifts
    • Gift Suitability: Ideal for baby showers!

    Materials You’ll Need

    • Soft acrylic or cotton yarn
    • Crochet hook (size G/4mm)
    • Yarn needle
    • Scissors
    • Stitch markers (optional)

    Crochet Abbreviations

    • ch: chain
    • sc: single crochet
    • st: stitch
    • rnd: round

    Before You Start

    Before starting your crochet mittens, here are a few tips:

    • Choose a baby-safe yarn that is soft and gentle on delicate skin.
    • Maintain consistent tension throughout your project for even stitches.
    • Check your stitch counts as you go to avoid any discrepancies.
    • We suggest making a practice swatch to confirm your gauge, even if the project is small.

    Free Crochet Baby Pattern

    Main Piece

    Round 1: Ch 16, join with a sl st to form a circle.
    Round 2: Ch 1, sc in each ch around (16 sc), join.
    Round 3: Ch 1, 2 sc in each st around (32 sc), join.
    Round 4: Ch 1, sc in each st around (32 sc), join.
    Round 5-8: Repeat Round 4.

    Finishing

    • Fasten off and weave in the ends.
    • Snugly fit the mittens on the baby’s hands, ensuring no loose yarn ends.

    Baby-Specific Tips

    When creating these mittens for babies, keep the following in mind:

    • Opt for yarns that are ultra-soft and breathable.
    • Ensure there are no scratchy seams that could irritate the baby’s skin.
    • Double-check that all attached elements are secure and safe for little ones.
    • Make sure the finished size is appropriate for the baby; mittens shouldn’t be too loose.

    Customization Ideas

    Add a personal touch to your mittens with these customization ideas:

    • Use different colors to match nursery themes or personal preferences.
    • Add textured stitches for visual interest.
    • Embroider initials or simple designs on the mittens using embroidery thread.
    • Create matching accessories such as hats or booties to complete an adorable set.

    Common Problems & Troubleshooting

    Here are some solutions to common issues you may encounter:

    • Incorrect stitch counts: Count your stitches after each round to ensure accuracy.
    • Uneven tension: Practice maintaining a consistent grip on your yarn and hook.
    • Sizing issues: Measure your work against a known size or use a baby to ensure proper fitting.
    • Loose seams: Reinforce your stitches by crocheting with a tighter tension.

    Care Instructions

    To keep your mittens looking new, follow these simple care instructions:

    • Hand wash with mild soap and cold water.
    • Lay flat to dry to maintain the shape and size.
    • Avoid bleach and high-pressure washing machines.

    Baby Safety Notes

    When crafting items for babies:

    • Avoid using detachable embellishments like buttons that could pose a choking hazard.
    • Regularly inspect the mittens for wear and tear.
    • Ensure all portions are securely stitched and safe for infant use.

    Frequently Asked Questions

    • Is this crochet baby project beginner-friendly?
      Yes, this project is perfect for beginners looking to practice basic crochet skills.

    • What yarn is best for this baby crochet project?
      Soft acrylic or cotton yarn is ideal for babies.

    • What size will the finished project be?
      The mittens are designed to fit newborns.

    • Can I make it in different colors?
      Absolutely! Use any combination of colors to match your style.

    • Can I make the project larger or smaller?
      Adjust your chain length at the beginning to customize the size.

    • Is this suitable as a baby shower gift?
      Yes, these mittens make a thoughtful and practical gift.

    • How should I wash the finished crochet item?
      Hand wash gently and lay flat to dry.

    Conclusion

    We hope this tutorial inspires you to crochet these adorable newborn mittens. They are not only practical and useful but also a delightful way to show you care. So grab your yarn, follow the steps outlined, and enjoy the process of creating something special for a little one in your life!